Last Update: 4/11/13
As this is a complete DIY project I might show a few of my plans and progress here…
I update this page as I go along.
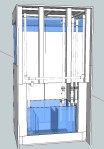
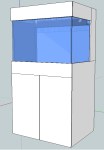
The Tank
Custom ordered 800x500x500 from 6mm Optiwhite Glass, 10mm base. 55mm Front, Back and Cross Braces.
The Stand
The stand is entirely made from 2×4 planed timber and screwed together. I have a 12mm plyboard at the bottom and a 20mm plyboard at the top. On top of that I also put a 18mm Styrofoam board.


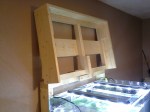
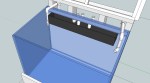
The Hood
Made from 2×2 planed timber for the frame, 6×1 for the sides and 2×4 for the support.


-
- The finished Product with doors etc.
The Sump
Made from 6mm glass. Was very tricky as the compartments are very small and not easy to get in with the siliconegun. One can see that it was my first time siliconeing an aquarium 😉 horribly messy in some places as I had to apply the silicone bit by bit with my fingers. Also had to battle with 2mm gaps as the glass company that cut these plates is apparently not very accurate. Next time I might use a template to run the silicone beads and then place the glass in afterwards on top of the beads if that makes sense. This should be good enough for baffle plates and other internal compartments.
The main thing is that you prepare everything perfectly tape the tank on a perfectly level surface. make sure you are happy with the lining up of the main outer glass. Prepare gloves (and lots of spare gloves) spare silicone tube, knive to open it, all the glass pieces for internals in the sequence you will glue them and a sweatband for the adrenaline sweat 😉 Before I started I went through the whole process in my head to make sure I have everything and know each step as you only have a few minutes to silicone everything and run your finger (I use disposable gloves) along the beads before it forms a skin.
It looks good and I am happy with it even though its very messy. Now the silicone needs to dry for 4 days according to the special Aquarium silicone I used. Seems longer than others but its probably on the safe side.
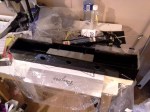
Some small advice here to anybody doing something similar. It seems logical to me now but I forgot about it when ordering the pump. The Pump spec states 2400lph and 2m max delivery height. Now that means at 2m you have no flow or very little. At 0m you have 2400lph. Before you buy a pump look at the delivery curve of the pump. Because I didnt I will end up with only 600lph at 1.6m which is about half of what I wanted. I am not sure if it will be enough for keeping the DT water clean enough at that speed.

-

- Spacers for guidance
-

- not a very neat job but I am still happy with the result because I am confident it will hold and thats the main thing 😉

-

- Sump
The Overflow box and Plumbing
Made from 5mm black acrylic. I used silicone to assemble it even though it is not advised. It surely doesnt hold extremely well but I might need to take it apart again if it doesnt work so silicone is perfect for me. I roughened up the edges so that the silicone might hold better. The grid is a woven stainless steel 2mm mesh from ebay.
The Overflow is a “Safe and Silent” or also known as BeanAnimal type overflow system with three outgoing pipes. Checkout this page for more info on it.
At this stage still waiting for some plumbing parts that came wrong so will update this once its working and installed. I have started cutting some of the pipes and glueing what I can bit with the last parts I wasnt to wait until I have the sump in place to be sure it works out as once its glued there is no way back. (Update: System is finished and is working great, no leaks 🙂 )

-
- Overflow box and return pipes


-

- From the back showing the plumbing in and out of the sump.